
Sometimes we want to see how our app behaves locally before taking it live.This Tutorial is all about Android localhost connection using XAMPP server. Here, I’ll use my Newscrisp App which i’ve created recently for demonstration. Newscrisp uses Retrofit Library for Networking.
Initially download XAMPP server version according to your operating system in order to setup android localhost. In this tutorial, I will use Mac OS to demonstrate usage of Android Localhost connection.
[widget id=”text-3″]
You can also find the video tutorial on Android Localhost connection using Xampp and Django servers below:
[widget id=”text-3″]
Steps to implement Android Localhost connection using XAMPP Server:
Starting the services:
[widget id=”text-4″]
- Open XAMPP application and Start the application by clicking upon start in General Tab.

- Later, click START ALL services in Services tab in our Xampp Application.
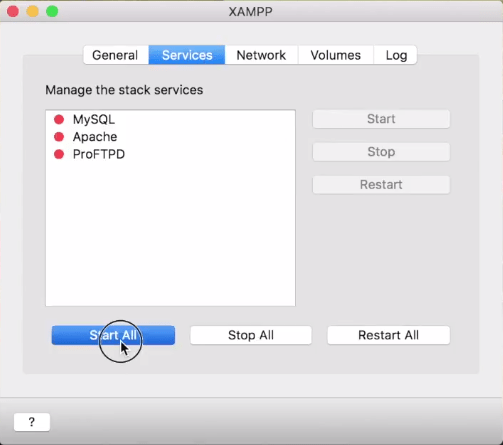
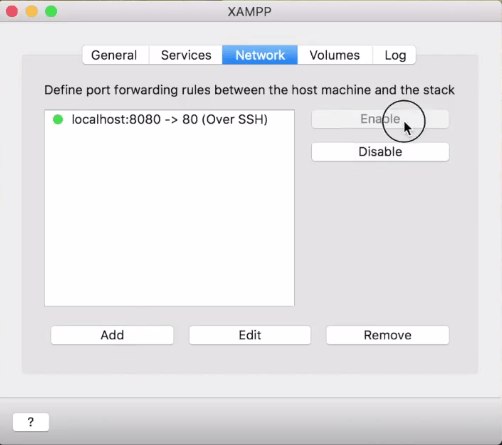
- Then, click ENABLE in Network tab for local host forwarding.
- Now, click MOUNT to explore the XAMPP folders


After all this, we could find htdocs folder in our XAMPP folder in which we can place our required files in order to navigate from our localhost.
To test our Xampp server, let us try the following link (localhost:8080/dashboard/) and now the url should display the contents of index.html present in htdocs>dashboard folder.

Now, Create an internal folder, named json in htdocs folder to place our json file. Here i am placing a json file which I have prepared for the tutorial in my json folder.
Android Localhost Connection in Android Studio:
[widget id=”text-3″]
- Open Android studio to modify our project accordingly
- Update the BASE_URL in our code according to the android developer documentation as below


3. Since I am using Retrofit library, in order to form complete url, i will create an interface as shown in the image below.
4. Now, run the emulator and we could see the articles written in json format are loading in our app from our localhost.
[adinserter block=”1″]
