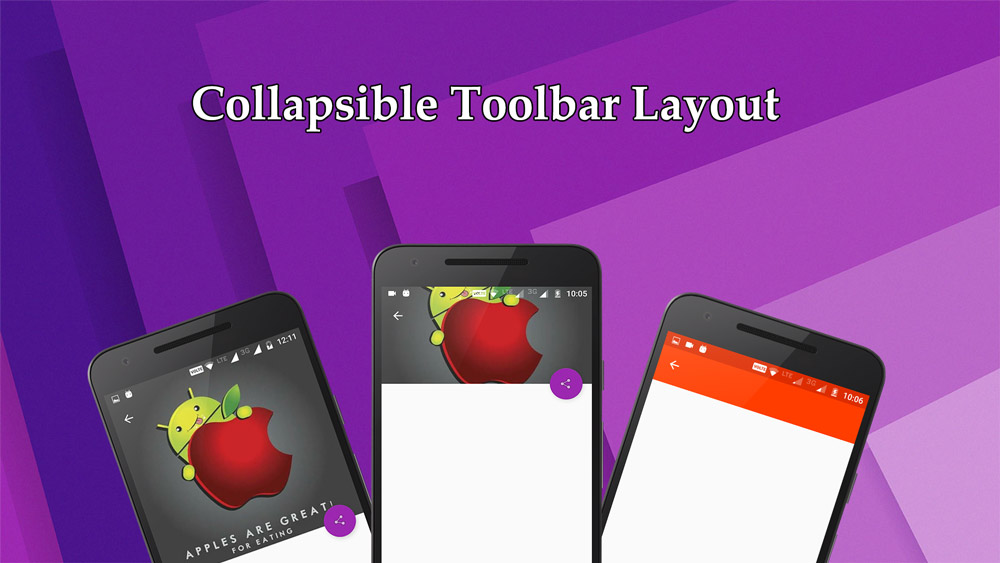
In this article, we are about to discuss how to add a Collapsing toolbar layout to our Android Project. Collapsing Toolbar Layout provides a nice appealing interface with an imageview in toolbar which fades and collapses from toolbar when the content is scrolled towards bottom. Collapsing Toolbar Layout is directly available from Design Support Library released by Google in Mid 2015 which introduced many default layout features such as NavigationView, TextInputLayouts, Snackbar, Tabs, etc.
The following image demonstrates what we would like to achieve in this article.
So let us see how we can add the exciting Collapsing Toolbar Layout to our Android Project. The source code for this tutorial can be cloned/downloaded from the github repo below:
Related Links:
Android Layouts and Type of Android Layouts
Collapsing Toolbar Layout Integration using Android Studio:
[widget id=”text-3″]
- Before doing anything, let us add the design support library in our App Module’s build.gradle file’s dependencies.
compile 'com.android.support:design:24.2.1'
To get the latest version of support library, head-on to this website.
- Next we are going to add the following styles to our res>values>styles.xml file:
    <style name="AppTheme.NoActionBar">
        <item name="windowActionBar">false</item>
        <item name="windowNoTitle">true</item>
    </style>

    <style name="AppTheme.AppBarOverlay" parent="ThemeOverlay.AppCompat.Dark.ActionBar"/>
Next we will also add the following styles to our res>values-v21>styles.xml file so that we can achieve transparent status bar for devices above API V21:
<resources>
    <style name="AppTheme.NoActionBar">
        <item name="windowActionBar">false</item>
        <item name="windowNoTitle">true</item>
        <item name="android:windowDrawsSystemBarBackgrounds">true</item>
        <item name="android:statusBarColor">@android:color/transparent</item>
    </style>
</resources>
If the above folder doesnot exist in your project, create it manually. This will make the status bar transparent with the image from the collapsing toolbar layout. These are the styles we are going to use in our project.[widget id=”text-15″]
- Now open manifest file to use the newly created style for our Activity. We add the following attribute to our activity to ensure that we use the toolbar we declared in our xml and not the actionbar provided by the android:
android:theme="@style/AppTheme.NoActionBar"
- Next we are going to add a Coordinator Layout from the Design Support Library to our Layout as RootView.
<?xml version="1.0" encoding="utf-8"?>
<android.support.design.widget.CoordinatorLayout
    xmlns:android="http://schemas.android.com/apk/res/android"
    xmlns:app="http://schemas.android.com/apk/res-auto"
    xmlns:tools="http://schemas.android.com/tools"
    android:id="@+id/activity_main"
    android:layout_width="match_parent"
    android:layout_height="match_parent"
    android:fitsSystemWindows="true"
    tools:context="com.coderefer.collapsingtoolbarlayoutexample.CollapsingToolbarActivity">

</android.support.design.widget.CoordinatorLayout>
We need to add the attribute android:fitsSystemWindows=“true” so that we need to make sure interactive elements (like buttons) aren’t hidden underneath them. For more details, refer this article.
[widget id=”text-3″]
- Now we will be adding AppBarLayout inside our CoordinatorLayout.
<android.support.design.widget.AppBarLayout
 android:layout_width="match_parent"
 android:layout_height="wrap_content"
 android:fitsSystemWindows="true"
 android:theme="@style/AppTheme.AppBarOverlay">

</android.support.design.widget.AppBarLayout>
- Now we will be adding our CollapsingToolbarLayout to our AppBarLayout which we’ve included just now.
     <android.support.design.widget.CollapsingToolbarLayout
            android:layout_width="match_parent"
            android:layout_height="match_parent"
            android:id="@+id/collapsing_toolbar"
            android:fitsSystemWindows="true"
            app:contentScrim="?attr/colorPrimary"
            app:layout_scrollFlags="scroll|enterAlways">

            <ImageView
                android:layout_width="match_parent"
                android:layout_height="350dp"
                android:scaleType="centerCrop"
                android:fitsSystemWindows="true"
                android:id="@+id/iv_detail"
                android:src="@drawable/android_apple_fight"
                app:layout_collapseMode="parallax"/>

            <android.support.v7.widget.Toolbar
                android:id="@+id/toolbar"
                android:layout_width="match_parent"
                android:layout_height="?attr/actionBarSize"
                app:layout_collapseMode="pin"/>

        </android.support.design.widget.CollapsingToolbarLayout>
Here contentScrim is used to set the color of toolbar when Collapsible toolbar is collapsed.
- Next we need to add a NestedScrollView to our Coordinator Layout to support scrollview inside scrollview.
    <android.support.v4.widget.NestedScrollView
        android:layout_width="match_parent"
        android:layout_height="match_parent"
        app:layout_behavior="@string/appbar_scrolling_view_behavior">
        <include layout="@layout/content_collapsible_toolbar"/>
    </android.support.v4.widget.NestedScrollView>
The content which we need to display below the CollapsibleToolbarLayout can be included as separate layout which i’ve named as content_collapsible_toolbar.xml.
- If you want you might just include a Floating Action Bar (FAB) along with our Collapsing Toolbar Layout, you can do with just a small addition of code:
<android.support.design.widget.FloatingActionButton
        android:id="@+id/fab"
        android:layout_width="wrap_content"
        android:layout_height="wrap_content"
        android:layout_margin="16dp"
        app:layout_anchor="@id/app_bar_layout"
        app:layout_anchorGravity="bottom|right|end"
        app:srcCompat="@android:drawable/ic_menu_share"/>
The app:layout_anchor attribute helps the FAB to anchor to whichever layout we specify. The app:layout_anchorGravity tag here is helping the FAB to stick to bottom right to appbar layout as shown in the demo.
[widget id=”text-3″]
The completed xml for our Collapsing Toolbar Layout is as follows:
<?xml version="1.0" encoding="utf-8"?>
<android.support.design.widget.CoordinatorLayout
    xmlns:android="http://schemas.android.com/apk/res/android"
    xmlns:app="http://schemas.android.com/apk/res-auto"
    xmlns:tools="http://schemas.android.com/tools"
    android:id="@+id/activity_main"
    android:layout_width="match_parent"
    android:layout_height="match_parent"
    android:fitsSystemWindows="true"
    tools:context="com.coderefer.collapsingtoolbarlayoutexample.CollapsingToolbarActivity">

    <android.support.design.widget.AppBarLayout
        android:layout_width="match_parent"
        android:layout_height="wrap_content"
        android:id="@+id/app_bar_layout"
        android:fitsSystemWindows="true"
        app:elevation="0dp"
        android:theme="@style/AppTheme.AppBarOverlay">


        <android.support.design.widget.CollapsingToolbarLayout
            android:layout_width="match_parent"
            android:layout_height="match_parent"
            android:id="@+id/collapsing_toolbar"
            android:fitsSystemWindows="true"
            app:contentScrim="?attr/colorPrimary"
            app:layout_scrollFlags="scroll|enterAlways">

            <ImageView
                android:layout_width="match_parent"
                android:layout_height="350dp"
                android:scaleType="centerCrop"
                android:fitsSystemWindows="true"
                android:id="@+id/iv_detail"
                android:src="@drawable/android_apple_fight"
                app:layout_collapseMode="parallax"/>

            <android.support.v7.widget.Toolbar
                android:id="@+id/toolbar"
                android:layout_width="match_parent"
                android:layout_height="?attr/actionBarSize"
                app:layout_collapseMode="pin"/>

        </android.support.design.widget.CollapsingToolbarLayout>

</android.support.design.widget.AppBarLayout>

    <android.support.v4.widget.NestedScrollView
        android:layout_width="match_parent"
        android:layout_height="match_parent"
        app:layout_behavior="@string/appbar_scrolling_view_behavior">
        <include layout="@layout/content_collapsible_toolbar"/>
    </android.support.v4.widget.NestedScrollView>

    <android.support.design.widget.FloatingActionButton
        android:id="@+id/fab"
        android:layout_width="wrap_content"
        android:layout_height="wrap_content"
        android:layout_margin="16dp"
        app:layout_anchor="@id/app_bar_layout"
        app:layout_anchorGravity="bottom|right|end"
        app:srcCompat="@android:drawable/ic_menu_share"/>
</android.support.design.widget.CoordinatorLayout>
In the upcoming tutorials, we will be discussing more on what’s more from Android Design Support Library.


Gr8 work Sir………!