
In this tutorial we are going to discuss about admob android ads integration into your app using Android Studio. Admob is the most reliable solution for advertisements offered by google for android and ios Devices. Many use admob ads for their high fillrate and high eCPM(Effective Cost per Mille).
In this article we are going to integrate ads into a simple demo android project. These steps can be applied to any android project in which you want to integrate your ads.
Creating a simple Android Project:
[adinserter block=”2″]
- First we create a project by going into File > New Project and we simply name it as AdmobDemo. Hit Next.
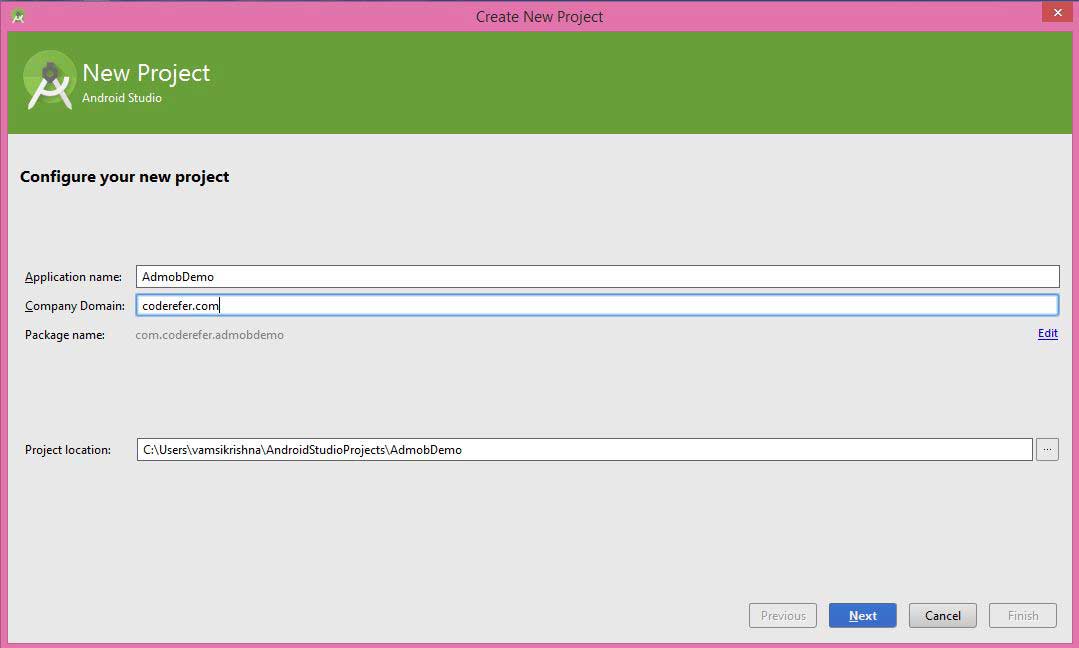
- Next we Choose minimum SDK and hit Next. For more assistance on Creating Android Project, refer to this article.
- We select Blank Activity and hit Next. We leave the Activity Name, Layout Name and Title Name as default values and hit Finish.

[widget id=”text-3″]
Now we have created a basic android project which is displaying default text – “Hello World!” . Now let us discuss about Admob android ads integration.
Admob android ads integration into Android Project:
- First of all make sure you installed Google Repository. If not, go to SDK Manager > Extras and install Google Play Services and Google Repositories. The package contains all the classes you need to display your ads such as Google Mobile Ads SDK.
- Now, Open your project’s Gradle Scripts > build.gradle(Module: App) and add this piece of code to your dependencies. This compiles and adds play services to your project which you use them to display your ads.
compile 'com.google.android.gms:play-services:7.5.0'
Here I have used the version 7.5.0 at the time of writing/modifying this article. To make sure that you always use the latest version of Google Play Services, update Google Play Services in SDK Manager and Go to File> Project Structure. Then on the Left, select App displayed under Modules. Select dependencies tab and click on “+” icon. Then click on Library Dependencies and select play-services and Hit Ok. [widget id=”custom_html-3″]
- Now the android studio adds the dependencies for your project. Make sure that you added this piece of code to your Module: App’s build.gradle but NOT to your project’s build.gradle. Hit Sync Now and Save the file. Now your app’s build.gradle’s code will look similar to this:
apply plugin: 'com.android.application' android { compileSdkVersion 21 buildToolsVersion "22.0.0" defaultConfig { applicationId "com.coderefer.admobdemo" minSdkVersion 10 targetSdkVersion 21 versionCode 1 versionName "1.0" } buildTypes { release { minifyEnabled false proguardFiles getDefaultProguardFile('proguard-android.txt'), 'proguard-rules.pro' } } } dependencies { compile fileTree(dir: 'libs', include: ['*.jar']) compile 'com.android.support:appcompat-v7:22.0.0' compile 'com.google.android.gms:play-services:7.5.0' } - Save file and Open your Manifest file by going to Apps > manifests > AndroidManifest.xml. Now we need Internet permission for Admob android ads integration. This permission is obtained by adding the following lines to your Manifest file.
<uses-permission android:name="android.permission.INTERNET"/>
<uses-permission android:name="android.permission.ACCESS_NETWORK_STATE"/>
- Now, to use play services to display our ads , we need to add the following code as meta-data tag:
<meta-data android:name="com.google.android.gms.version"
android:value="@integer/google_play_services_version" />
We add them in between our application element.
[adinserter block=”1″]
We also need an activity to display admob android banners and interstitials when an ad is clicked. So we declare that activity in our manifest file by adding the following code:
-
<activity android:name="com.google.android.gms.ads.AdActivity"
android:configChanges="keyboard|keyboardHidden|orientation|screenLayout|uiMode|screenSize|smallestScreenSize"
android:theme="@android:style/Theme.Translucent" />
After adding all the above lines of code the manifest looks like this:
<?xml version="1.0" encoding="utf-8"?>
<manifest xmlns:android="http://schemas.android.com/apk/res/android"
    package="com.coderefer.admobdemo" >

    <application
        android:allowBackup="true"
        android:icon="@mipmap/ic_launcher"
        android:label="@string/app_name"
        android:theme="@style/AppTheme" >
        <meta-data android:name="com.google.android.gms.version"
                   android:value="@integer/google_play_services_version" />
        <activity
            android:name=".MainActivity"
            android:label="@string/app_name" >
            <intent-filter>
                <action android:name="android.intent.action.MAIN" />

                <category android:name="android.intent.category.LAUNCHER" />
            </intent-filter>
        </activity>
        <activity android:name="com.google.android.gms.ads.AdActivity"
                  android:configChanges="keyboard|keyboardHidden|orientation|screenLayout|uiMode|screenSize|smallestScreenSize"
                  android:theme="@android:style/Theme.Translucent" />
    </application>
    <uses-permission android:name="android.permission.INTERNET"/>
    <uses-permission android:name="android.permission.ACCESS_NETWORK_STATE"/>
</manifest>
Now save AndroidManifest.xml and open the layout activity_main.xml which is created by default. Now open text tab located below and add the following code to display the ads on the bottom of your layout.
-
<com.google.android.gms.ads.AdView
android:id="@+id/adView"
android:layout_width="wrap_content"
android:layout_height="wrap_content"
android:layout_centerHorizontal="true"
android:layout_alignParentBottom="true"
ads:adSize="BANNER"
ads:adUnitId="@string/banner_ad_unit_id">
</com.google.android.gms.ads.AdView>
- You also need to make another change to your layout. You need to add the following parameter to your root Relative Layout:
xmlns:ads="http://schemas.android.com/apk/res-auto"
[adinserter block=”2″]
Now the activity_main layout’s code will look like this:
<RelativeLayout xmlns:android="http://schemas.android.com/apk/res/android" xmlns:ads = "http://schemas.android.com/apk/res-auto" xmlns:tools="http://schemas.android.com/tools" android:layout_width="match_parent" android:layout_height="match_parent" android:paddingLeft="@dimen/activity_horizontal_margin" android:paddingRight="@dimen/activity_horizontal_margin" android:paddingTop="@dimen/activity_vertical_margin" android:paddingBottom="@dimen/activity_vertical_margin" tools:context=".MainActivity"> <TextView android:text="@string/hello_world" android:layout_width="wrap_content" android:layout_height="wrap_content"/> <com.google.android.gms.ads.AdView android:id="@+id/adView" android:layout_width="wrap_content" android:layout_height="wrap_content" android:layout_centerHorizontal="true" android:layout_alignParentBottom="true" ads:adSize="BANNER" ads:adUnitId="@string/banner_ad_unit_id"> </com.google.android.gms.ads.AdView> </RelativeLayout> - Now hit save. You will get error as banner_ad_unit_id is not yet created. So we will create that in our next step.
- Go to app > res > values >strings.xml and open it. Add your publisher id in the string. The below line contains demo publisher id by google. Replace it with your own publisher id to show your ads.
<string name="banner_ad_unit_id">ca-app-pub-3940256099942544/6300978111</string>
The publisher id for your app is created when you sign in into Admob and clicked Monetise New App. Your publisher id is generally of the form: ca-app-pub-xxxxxxxxxxxxxxx/xxxxxxxxx.
[adinserter block=”2″]
- Now Hit save and the error in activity_main.xml file will disappear. If not, check for typos.
- Now open the activity in which you want to display your ads. In this case it is MainActivity.java. Add the following lines of code in your OnCreate() method after setting your content view to the layout which contains the play services code ( Here it is set to activity_main.xml):
AdView mAdView = (AdView) findViewById(R.id.adView);
AdRequest adRequest = new AdRequest.Builder().build();
mAdView.loadAd(adRequest);
Import the required classes (AdView, AdRequest) by clicking Alt + Enter and Hit save. Now you can display your ads by admob within your app as seen below.

Note: Make sure that you never click your own ads, even for testing as it may lead to permanent ban on your admob / adsense account. For testing purposes use the google’s demo publisher id which we used in the above example.
[adinserter block=”1″]


i can use all thinks as above.
but in last show me a error
the all ads example with the source code in this app :-
https://play.google.com/store/apps/details?id=manu.r06.AdmobAdsExample
Thankyou for this, but I have question that if already I have this added to my app, then how I can add Interstitial ad in my app?