
Android Splash Screen Example:
Many popular Android Apps such as Skype, Facebook, Adobe Reader, 500px, Dropbox etc., uses splash screen to display their logo. Most Android Apps uses Android Splash Screen before launching application Activity. Android splash screen is used to display a logo or brand for an app. In this article we are going to discuss about implementing an Android Splash Screen in a simple manner.
First we will create a new default project using these simple steps:
- Click on File > New Project.
- Next, define Application Name and Minimum SDK and hit Next
- Select Blank Activity and Hit Next.
- Hit Finish.
This creates a simple Hello world Project for which we will implement android Splash screen. We already discussed in detail about Creating New Android Project in our previous article.
Related Articles:
How to Test Android App on Real Devices like Android Mobile or Tablet using Android Studio
How to Test Android App on Emulator and setting up Android Virtual Device in New Android Studio
Creating Android Splash Screen:
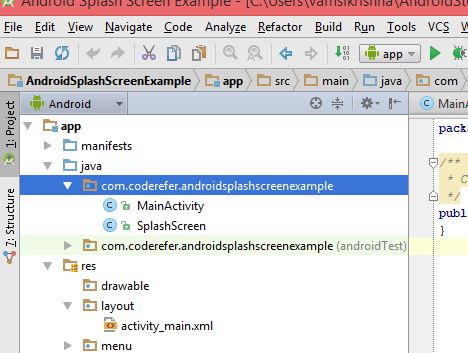
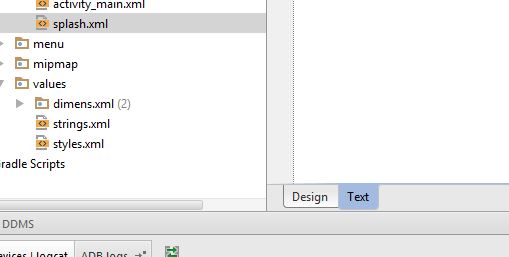
- To display a splash screen, we need a layout first of all. So let’s create a Layout by Right Clicking on Layout (located in App > Res > Layout) and selecting New > Layout Resource File. Give it any name. I gave it splash.xml. Now select Text tab located at bottom as shown in image below.
- Now Open File Explorer in your Operating System and paste the image you want to use as splash screen in Drawable Folder. (Generally located at C:\Users\UserName\AndroidStudioProjects\AndroidSplashScreenExample\app\src\main\res\drawable) . Advisable Image size is 800 x 1280 pixels and format is jpeg or png. Make sure that you named the image using small letters and underscores without using Special Symbols. I named it as splash_image.[widget id=”text-3″]
- Now type the following code in Text Tab of splash.xml:

This file contains bidirectional Unicode text that may be interpreted or compiled differently than what appears below. To review, open the file in an editor that reveals hidden Unicode characters.
Learn more about bidirectional Unicode characters
| <?xml version="1.0" encoding="utf-8"?> | |
| <LinearLayout xmlns:android="http://schemas.android.com/apk/res/android" | |
| android:layout_width="match_parent" | |
| android:layout_height="match_parent" | |
| android:background="@drawable/splash_image" | |
| android:orientation="vertical"/> |
Background is set to splash_image we just copied in Drawable folder. Here layout’s width and height are set to match_parent so that the background image fills the entire Layout.
[adinserter block=”8″]
4. Splash screen is a separate activity which will be displayed first ahead of all other Activity. We create splash screen activity by creating a class. We create a new class by Selecting App > Java > Your Package Name and right Clicking on your package and selecting New > Java Class. Give it any name. Here, I gave it as SplashScreen. Now Type the Following Code in SplashScreen activity:
This file contains bidirectional Unicode text that may be interpreted or compiled differently than what appears below. To review, open the file in an editor that reveals hidden Unicode characters.
Learn more about bidirectional Unicode characters
| package com.coderefer.androidsplashscreenexample; | |
| import android.app.Activity; | |
| import android.content.Intent; | |
| import android.os.Bundle; | |
| /** | |
| * Created by vamsikrishna on 12-Feb-15. | |
| */ | |
| public class SplashScreen extends Activity { | |
| @Override | |
| protected void onCreate(Bundle savedInstanceState) { | |
| // TODO Auto-generated method stub super.onCreate(savedInstanceState); | |
| setContentView(R.layout.splash); | |
| Thread timerThread = new Thread() { | |
| public void run() { | |
| try { | |
| sleep(3000); | |
| } catch (InterruptedException e) { | |
| e.printStackTrace(); | |
| } finally { | |
| Intent intent = new Intent(SplashScreen.this, MainActivity.class); | |
| startActivity(intent); | |
| } | |
| } | |
| }; | |
| timerThread.start(); | |
| } | |
| @Override | |
| protected void onPause() { // TODO Auto-generated method stub | |
| super.onPause(); | |
| finish(); | |
| } | |
| } |
We use methods of Thread class such as –
sleep(long time) – to make the thread sleep for some time (in milliseconds).
start() – to start the thread.
[widget id=”text-3″]
sleep takes the time in milliseconds as its parameter(3000 => 3 seconds). Here we used this delay time as the time to display the splash screen activity. After this delay time, MainActivity is started by the code written in finally{} block.
The splash screen activity must not be shown when the user presses the back button. In order to do this, we should destroy the splash screen activity after it is shown for few seconds. This is done by the use of onPause() method. The onPause() method is a method of Activity class which comes into play when the user leaves the activity.
Next, We need to define which activity to open after displaying Splash screen. This is done using the Intent(Context, Class) constructor of the Intent class.
5. Now to make your splash screen to work, you need to refer the SplashScreen Activity in Android Manifest. So, open the Manifest file by clicking on App > Manifests > AndroidManifest.xml. Now we add reference to new Activity we just created and Change the Launcher Activity (Activity which Launches first) to splash.xml by changing the code shown below:
[adinserter block=”8″]
This file contains bidirectional Unicode text that may be interpreted or compiled differently than what appears below. To review, open the file in an editor that reveals hidden Unicode characters.
Learn more about bidirectional Unicode characters
| <?xml version="1.0" encoding="utf-8"?> | |
| <manifest xmlns:android="http://schemas.android.com/apk/res/android" | |
| package="com.coderefer.androidsplashscreenexample"> | |
| <application | |
| android:allowBackup="true" | |
| android:icon="@mipmap/ic_launcher" | |
| android:label="@string/app_name" | |
| android:theme="@style/AppTheme"> | |
| <activity | |
| android:name=".SplashScreen" | |
| android:label="@string/app_name"> | |
| <intent-filter> | |
| <action android:name="android.intent.action.MAIN"/> | |
| <category android:name="android.intent.category.LAUNCHER"/> | |
| </intent-filter> | |
| </activity> | |
| <activity | |
| android:name=".MainActivity" | |
| android:label="@string/app_name"> | |
| <intent-filter> | |
| <action android:name="com.coderefer.androidsplashscreenexample.MAINACTIVITY"/> | |
| <category android:name="android.intent.category.DEFAULT"/> | |
| </intent-filter> | |
| </activity> | |
| </application> | |
| </manifest> |
6. Now Hit Run Button (or Shift+ F10) and select Emulator or Real Device to run the program. Now you can see Android Splash Screen displaying before your activity.
You can refer to our previous articles on How to run android program on real Device and How to setup and test android project on Emulator for any reference.
[adinserter block=”8″]

the application crached despite i add the right reference about my main Activity
Can anyone help me
Make sure to use you typed .MAINACTIVITY in block letters in manifest file’s action tag
Hey, I get the splash screen fine but after 3 seconds my main activity fails to start. Can u help?
There might be some typo in your Splash screen’s intent parameter (or) may be in your Main activity’s intent-filter’s action:name which is declared in your manifest. Intent takes action as its parameter. Here it is “com.coderefer.androidsplashscreenexample.MAINACTIVITY”. Make sure you match them exactly.
Thanks I solved it!
My splash screen works on my emulator but not on my device. Any idea why?
There may be some error in your package name. You may find this link useful: http://bit.ly/1Unw1OF
Very very helpful man, tks for working on this tutorial. Work fine. <3
To get rid of the white screen that precedes the splash screen you might add:
android:theme=”@android:style/Theme.Translucent.NoTitleBar”
as an attribute within the activity tag for the splash screen activity.
Not sure about compatibility with different API levels though.
And of course: Thank you for the instructions!
Good point: it helped me.
Thanks but after the splash screen is shown, my app crashes.
Hi? Did you manage to solve your problem coz I have a similar one
Did you manage to resolve this Isssue?
sharing the error from logcat will be helpful to know where it went wrong
Amazing This is the only tutorial that worked. Thank you
Glad to know.. Happy coding!
finally{
Intent i = new Intent(SplashScreen.this, MainActivity.class);
startActivity(i);
}
this is better, and more compatible
Agreed. Thanks for the comment. Will update the code as its more helpful for reuse.
You’re welcome, it’s nice to help
Thanks for sharing. It is worked in android studio. In emulator i can see splash screen. but when i am trying at phone app works but splash screen not seen.
when I restart my application will not redisplay the splash D:
If my package name is com.example.game and main activity class name is AppActivity what will happen to this line in the manifest file?
I was wondering the same thing. why is MAINACTIVITY in capital letters here ?
Hi Hasan, you can give your name attribute as follows:
“com.example.game.APPACTIVITY”
If I am extending Activity what should the Activity class look like? My code is not compiling, because I have not created a savedInstanceState variable and InterruptException class. Can someone help me resolve where / how I should do those
Excelent post my friend. Congrats!
Thanks mate! more coming soon.. make sure to subscribe for latest posts and updates!
I got a confusion here with this line, in my mainfest.xml the code is as follows:
so what will be the line of code in SplashScreen.java:
finally{
Intent openMainActivity= new Intent(“com.coderefer.androidsplashscreenexample.MAINACTIVITY”);
startActivity(openMainActivity);
}
Hi gilson, check the code from the explanation. You can use
Intent i = new Intent(SplashScreen.this, MainActivity.class);
Also you have mentioned the name property as android.intent.action.MAIN. This makes the main activity to launch first. Use a specific unique value such as
Cool, works. Thanks!
awesome tutorial 😀 clean and simple works for me … thanks a lot buddy
Amazing:)
You are awesome man, Thank u so much!
Hi prince, Thank you. Glad to help you.
Hi Vamsi, thanks for your great tutorial. I am new to android app development, but with your explicit instructions to create a splash screen, I could easily create one and integrate into my app.
However, I am facing a slight problem with the image. The splash screen shows my image with a vertical stretch. Is there any way I can rectify it ?
after implementing the splash screen i get two icons of my one app. Why this happen any solution ?
Thank you so much man!
Hi? I have a slight problem, once the splashscreen is shown the app crashes…how do I fix it?
Hi.
The app works great in my phone, but in Genymotion Emulator using Android Studio 1.5 (after importing your project) I get not splash screen with your logo, just a grey splash screen and fynally the main screen.
Any idea about this behavior?
Thanks for you work!!
Check for Splash screen image size.. It might be too large
Thanks again, Vamsi: I am merging it with another tutorial by you.
Let us see what can be done!
What if i wanna to create dynamic splash screen like i wanna to fetch json data then after remove splash screen then??
Thank you. It was helpful.
Thanks
I have 6 different splash screen for 6 different screen sizes(mdpi, hdpi, xhdpi etc) How can I display the respective splash screen?
Thank you this was great!!!
do you have a tutorial on search in listview of objects with customadapter?
please….
I can’t download the file.
In manifest showing redline .SplasSreen and .MainActivity
In class folder
(R. Also red color
Help me
change every instance of “com.coderefer.androidsplashscreenexample” to “com.yourcompany.yourappname” and that fixes it.
very nice tutorial!
Thank you!!!
Hi, on the spash.xml file im trying to add a imageView it acts like its there but its not showing up when i run it on emulator other than that it works perfectly
i’m getting error in android:icon=”@mipmap/ic_launcher” how to fix it
sir, i am not getting option of java class.
i m only gettin g option od c++ class
what to do?
help